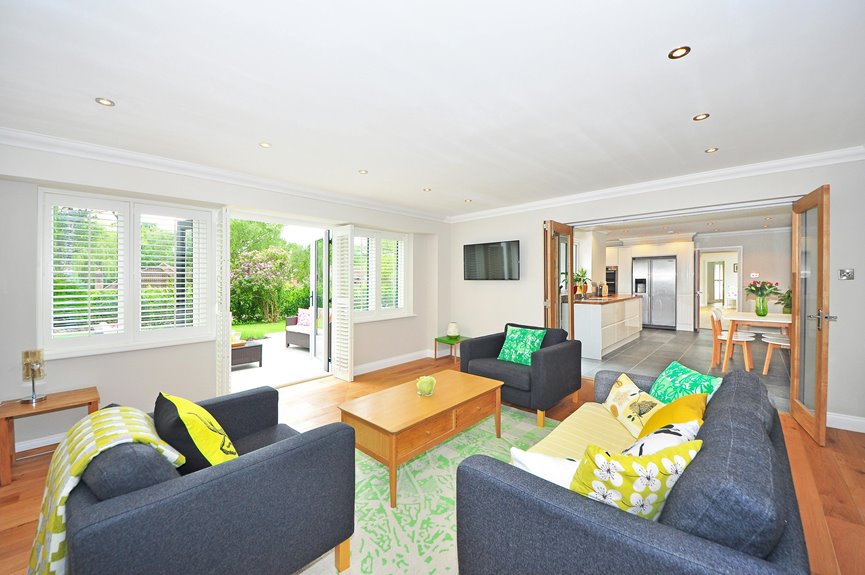
Start by counting fixtures using the half-ceiling rule: divide your ceiling height in half for ideal spacing. For an 8-foot ceiling, space lights 4 feet apart, positioning them at least 3 feet from walls. A standard living room typically needs six fixtures, though smaller rooms may need four and larger spaces require eight or more. Choose 6-inch cans for general lighting and 4-inch fixtures for task areas. Select warm color temperatures (2700K–3000K) and LED-compatible options. Map placement on a scaled diagram to prevent glare and shadows near seating zones. Plan separate switches for different areas to customize your lighting experience further.
Determine How Many Fixtures Your Room Needs

How many can lights does your living room actually need? You’ll typically want around six recessed lighting fixtures for a standard-sized room. Your ceiling height and spacing determine your fixture count directly.
For a standard living room, plan for approximately six recessed lighting fixtures, with ceiling height and spacing as your main determining factors.
For an 8-foot ceiling, space your lights approximately 4 feet apart. This creates even distribution and minimizes harsh shadows across your room. Position fixtures at least 3 feet from walls to avoid concentrated brightness near edges.
Consider your room’s specific dimensions when planning. A smaller living room might need only four fixtures, while larger spaces require eight or more.
Dimmer-capable LEDs offer flexibility. They let you adjust brightness based on activities—brighter for entertaining, dimmer for relaxation. This flexibility reduces how many fixtures you actually need while maintaining comfort.
Measure and Space Lights With the Half-Ceiling Rule

Once you’ve determined your fixture count, it’s time to map out their exact positions. The half-ceiling-height rule simplifies this process: divide your ceiling height in half to find ideal spacing between recessed lights. For an 8-foot ceiling, space fixtures 4 feet apart. This creates even illumination throughout your living room.
Start by sketching a scaled diagram of your room layout. Mark fixture positions using a grid pattern. Position lights at least 3 feet from walls to prevent harsh shadows. Use an online calculator or measure in inches for precision before drilling.
Focus on maintaining consistent gaps between all recessed lights. This approach provides balanced lighting across your entire living room, eliminating dark spots and creating your ideal lighting plan.
Pick the Right Fixtures and Brightness

What size can light works best for your living room? Choose 6-inch recessed lighting for general ambient illumination that matches your room’s scale. Use 4-inch cans for accent or task lighting in specific zones.
Selecting Trim Options and Brightness
Your trim choice directly impacts glare and light output. Baffle trims reduce glare for comfortable viewing. Reflector trims boost brightness when you need stronger illumination. Adjustable eyeball trims let you direct light precisely where needed.
Color Temperature Matters
Pick 2700K–3000K color temperature for a warm living room ambiance. LED options offer superior energy efficiency and longevity. Higher CRI ratings deliver true color rendering.
Create Layered Lighting
Pair your recessed lighting with floor lamps, table lamps, or wall sconces. This combination provides flexible ambient, task, and accent lighting layers throughout your space.
Map Your Placement to Avoid Glare and Shadows

Strategic placement separates good lighting from frustrating glare and dark spots.
Calculate Your Spacing
You’ll want recessed lighting spaced roughly half your ceiling height apart. For an 8-foot ceiling, aim for 4 feet between fixtures. This spacing creates even illumination throughout your living room layout without creating harsh shadows in the center.
Position Fixtures Strategically
Keep recessed lighting at least 3 feet from walls to prevent glare issues near vertical surfaces. Avoid placing lights directly above seating areas, which causes glare on TV screens and reflective surfaces.
Use Wall-Wash Lighting
Consider wall-wash lighting placements in corners instead of center-focused arrangements. This approach provides softer overall illumination while emphasizing architectural features and artwork.
Create a Scaled Diagram
Map your placement on paper first. Test spacing with a calculator, then adjust based on focal points like fireplaces and windows.
Plan Zone Controls for Flexible Lighting

Why settle for one brightness level across your entire living room? You’ll create superior ambiance by dividing your space into distinct zones. Assign separate switches or dimmers to entertainment areas, reading nooks, and entry spaces. This approach lets you independently adjust recessed lighting based on activity and time of day.
Use multiple control points throughout your room. Position dimmers near your couch for entertainment lighting adjustment. Place another switch by reading areas for task lighting control. All fixtures should be LED compatible—models like Nora Onyx Baffle or Cree High-Lumen LEDs maintain consistent color temperature without glare issues.
Consult a lighting layout diagram to map placements accurately. Coordinate adjustable and fixed fixtures within each zone. Dimmed ambient lighting suits living areas; brighter task lighting enhances reading spaces. This systematic approach delivers customized control throughout your room.